
I tried the sauteing procedure from 'How to Cook Without A Book.' I was nervous, but it was so easy! In no time at all, I was able to have some nice and juicy chicken breast, without it being tough and stringy. And, a pan sauce to boot! (The pan sauce was a balsamic vinegar one).
Sauté procedure:
1. Place the butter and oil on the skillet at low heat while preparing the meat.
2. Season the meat with salt and pepper, then dredge with flour. 2 minutes before actual frying, turn the heat up to medium high and wait for the butter to turn golden and smell nutty.
3. Cook the chicken breasts for 3 minutes on each side, turning only once (since my pieces are on the thin and small side, 2.5 minutes may be better). I covered the pan by the second turn.
4. Make the pan sauce reduction + whisk in butter after liquid has reduced to half.
5. Done!
Easy-peasy. It's even quicker than stir-frying! And the chicken breast did taste good... I'm a happy cook!
Wednesday, May 26, 2010
Tuesday, May 25, 2010
Soft Wrap Flatbread Sandwich
 Flatbread fresh from the skillet
I've always wished I could bake at the apartment but alas, I do not have an oven. However, my wish came true when I found this recipe at a blog. It was a flatbread that could be baked on a skillet. After some investigation, I found out it came from none other than the KA baking site! However, the blog poster mentioned that she used whole wheat flour instead of the original AP flour, so I decided to use WW flour as well. And what else did I use but the very nice White Whole Wheat Flour (Bob's Red Mill) that I found (finally!) at Healthy Options in Greenbelt. It was quite expensive (they only had organic WWW), but the sight of organic white whole wheat flour was quite exciting. It looked a lot like whole wheat pastry flour.
The first time, I did the recipe to the letter, but halving the ingredients so I came up with 4 flat breads. Putting boiling water at the start made a big difference in the manageability of the dough. It was very easy to knead and work with, I hardly needed to knead at all! I had to add more water (about 1 cup), though and a little bit more after I added the other dry ingredients. I dry-fried them on the wok soon after the 2nd proofing and they turned out great! I thought they were a bit on the salty side, though (I used a bit more than 1/2 tsp of salt), but I didn't find the breads salty the next day. Weird.
 Tuna soft wrap sandwich with a dash of vinegar and pepper. It was quite good...
The next time (this morning, actually), I decided to be smart-ass and do my own variation. I wanted something creamy like naan, so I decided to put in some yogurt. And I wanted to freeze the doughs so I would always have fresh baked flat breads. The initial variations I made were:
Half-recipe:
1. 1/2 tsp of salt
2. 1 tsp of sugar
3. slightly heaping 1/2 tsp of yeast (for freezing)
4. a pack of yogurt (1/2 cup)
5. divided the dough into 5 pcs instead of 4
Unfortunately for me I may have made a recipe for disaster right from the start. Looking back, the answers are obvious: I didn't thoroughly read the recipe because I thought I already knew what it was about. I was a stingy with the boiling water because I wanted the yogurt to take center stage (I was planning to mix it after adding the dry ingredients). I didn't mix the boiling water and flour until it was smooth (a major oversight)!
I was wondering why the water-and-flour mixture was still sticky after the 30 minute rest, but thought it was just a quirk and proceeded to add the 2nd dry ingredients. Here is where another bumble took place. The dough seemed too stiff so I kept adding more yogurt, until the whole pack was gone! Really, I don't think that 1 1/2 cups of flour would need that much yogurt. Everything was a sticky mess that wouldn't come together. The previous dough was a dream to knead, but the new dough variation was a nightmare! I struggled and struggled until I ended up adding about 1/4 cup more flour and more potato flakes. I relented after many long minutes of kneading and let it rise for about half the time for the first rise, cut it up into 5 pcs (I could've made it 6), and tossed the shaped dough into the freezer. Here's hoping that the dough could be saved. I hate to throw away perfectly good ingredients.
Update:
I baked the frozen-and-thawed dough. The dough was very sticky so I had to roll it between 2 pieces of cling wrap. Baking took considerably longer. The bread also did not develop wrinkles and bubbles. When I fished it out of the pan, it was very soft - extremely so. Still, I used it for my standard soft-wrap. It was passable, considering that the taste is mostly from the filling, but the taste and texture of the bread itself was a disappointment. Obviously, adding all that yogurt did not affect the taste at all (it was bland), and the texture is shot. It was too mushy and squishy. I'll be sticking to the original recipe next time, adding just a tsp. of sugar.
Dubious chicken teriyaki, Decent stir-fry
 Overcooked chicken with a too-watery sauce
I tried my hand at a chicken teriyaki recipe from my Japanese recipe book last week. I bought the chicken breasts and even separated the breast from the bone myself (tough job, but I somehow managed thanks to my new and sharp knives). However, I should've known there was something fishy about the recipe since the sauce (which is cooked together with the chicken) contained no thickener whatsoever. I found it very strange but went ahead with the instructions. The result? Overcooked, slightly tough chicken breast with watery sauce. I can't believe my recipe book would let me down. Since the chicken cooked with the liquid, the searing and browning went to waste too (the chicken got boiled instead). I'm trying out a different recipe next time for chicken teriyaki.
 Oyster sauce stir-fry from odds and ends in the fridge.
But at least I had a decent dish next time. Using the vegetable odds and ends from the fridge, I was able to make a decent oyster sauce stir-fry yesterday. I used the standard 'How to Cook without a Book' technique and for the sauce, used the first recipe in my new Periplus Simple Stir-Fries cookbook. Just great, though it's a pity the kangkong shriveled up the next day when I reheated.
Sunday, May 16, 2010
New Cookware!
In an attempt to be healthier and improve my cooking by using the right tools for the job, I bought some cookware today. Shopping for the right cookware was much more of a pain than I expected.
I first went to Gourdo's. The store personnel, Ryan, was very attentive and listened to my rants (though I overstayed in the store). It just takes me too long to decide anything. I actually found the perfect size and shape of skillet at the right price - unfortunately, it was coated in Teflon, the very thing I wanted to avoid and the main reason I decided to shop for a new pan. I also found the cast iron cookware that they had very interesting (and the price was lower than I expected!), but they were just too heavy to haul back home.
 Omelettes, frittatas, pancakes, crepes....
In the end, I bought an 20 cm (8 in) frying pan, branded Green Pan which is supposed to be heat resistant up to 450°C or 850°F and uses Thermolon non stick technology instead of Teflon. Apparently it's ideal of shor high heat searing, frying, or flambeing. One has to be careful when using it though: warm it first (don't let it get too HOT), then pour in the oil, then wait about a minute for the oil to heat. The pan shouldn't get too hot. I bought this pan thinking it would be convenient for omelets and pancakes.
 A wok, which I found out later has the same diameter at the bottom as my other smaller frypan! Oh well, I think it would be great for saucy/soupy dishes.
I couldn't find the perfect skillet at Gourdo's so I went to Landmark instead and ended up with a 26cm (10 in) wok from the maker Neoflam. It's made with ceramic so apparently it's non-toxic and heats evenly. I really wanted a saute pan, but I figured a wok is versatile enough, and I'll be searing meat in batches either way. (I still wish I had an 11" skillet, but alas it is not to be). I find it strange though, that the pan recommends low to medium flame (and I thought woks require high heat?). Oh well, at least this means I don't burn my food.
Other new gadgets that I found myself having: a Microplane(!) and a set of smallish knives and kitchen shears.
 The thought has been simmering at the back of my mind for a while, but this was definitely an impulse purchase. Do I really need to grate that much? O_o; But yeah, it would be great for zesting.
I really hope these new pans and gadgets (that I paid a tidy sum for) would help push me to the next level.
----------
I ate lunch at New Bombay Greenbelt 4 (didn't realize they had a new branch there). The paneera and spinach was good though I'm surprised the chef didn't make it spicy enough! The lassi was GREAT. The naan was so-so. The best naan for me can really only be found at Pokhara....
For dessert, I went to the new French Patisserie called Bizu. It's only now that I fully realized that Japanese pastry shops are different because they follow the French style! I skipped the luscious-looking Operas and other mini cakes and opted for the Macarons instead (Php 35 each). I'm interested to know what all the hype was about. I had the mint, chocolate, and pistachio. It was sweet, but not in-your-face sweetness of local stuff, which was good. I think I should've stopped at the 2nd macaron, though. The sugar was starting to overwhelm me by the third piece. The chocolate flavored one was divine.
Saturday, May 15, 2010
Conquering the Stir-Fry
 First attempt: Pork with soy-sesame sauce
This week marks my first TRULY serious attempts at cooking, armed not only with a vague recipe but a clear idea of the technique. In fact, I concentrated solely on one technique: the STIR-FRY.
My idea of cooking has always been the image of stir-frying: the cook tossing meat and vegetables around, then placing it atop some hot rice. It looked simple enough, and the technique and taste was distinctly Asian, my preference. However, until now, none of my attempts have even come close to the stir-fries I've had in restaurants. The reason only became apparent to me after way too many failures: I needed technique if I was to create a proper stir-fried dish.
 Lemon chicken with asparagus and mushrooms
1. Marinate the protein in a tbsp each of rice wine and soy sauce for a short while
2. Cook the protein in batches in a very hot skillet to sear the meat and prevent it from boiling,
3. Setting aside the meat, then tossing in the onions,
4. Then putting in the minced garlic and ginger
5. Then the vegetables, in the proper order they should be cooked
6. Put the meat back,
7. Toss in the flavoring sauce prepared beforehand
8. and then some cornstach in chicken broth to thicken.
And that's it! Following the formula, I was able to make some very decent stir-fries. I have a problem with the book's flavoring sauce recipes though. The Soy-Sesame sauce was too salty for me. The Lemon flavoring sauce was too lemony and lacked depth of flavor. The third time, I decided to make my own original sauce, and it turned out the best of the three. The protein and doneness of the vegetables were spot-on, though. I was surprised how juicy the chicken breast turned out. For the first time, I was made aware of the importance of texture in cooking food. I always thought it was just about taste.
 Third time's the charm: tofu and ground meat with an original sauce concocted out of sake, shoyu, hoisin sauce, worcestershire sauce, and sesame oil. (I think I'll replace sake with mirin next time. I also didn't add the ginger).
I think I have come close to mastering the stir-fry! Next on the list: Sautéing.
Monday, May 10, 2010
Condensed Milk Pound Cake
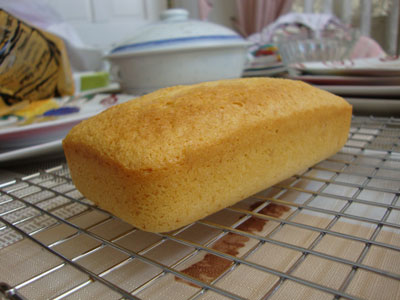
This week, I decided to try out recipes using simple and easily available ingredients, so I tried out this Condensed Milk Pound Cake recipe. The recipe came from here.

tight crumb, simple but delicious flavor.
My variations are as follows:
1. I lessened the sugar from 45g to 30g, and increased the condensed milk a tad (about 1 tbsp to account for the whole wheat flour).
2. The original recipe called for cake flour. I used my Whole Wheat Pastry flour.
 Doubling the recipe makes 3 mini loaves. I put a lot of vanilla extract (1 1/2 tbsp) the first time, and I thought the vanilla flavor was slightly overpowering. So next time (for 2 loaves) I put in only 1 tbsp but this time I miss the vanilla flavor!
For the bigger pound cakes, I had to tent them with foil (20 minutes in for lesser browning). The top of my oven really is too hot.

Nyan said it was too buttery(!?) Never mind, I don't trust her judgment much. The cake did taste better and was moister the next day. I find it a tad too dry, though. It wasn't as soft-looking as the original blog pic. But it's not bad either, (tastes quite good out of the oven actually), so I'll definitely be making this again next time I need a simple pound cake recipe.
Honey Wheat Rolls
 Today marks my first foray in the land of yeast breads. The honorary recipe? Honey Wheat Bread from the King Arthur website.
 That's about as close to "round and smooth" as I could knead it...
This was one of the times that I sorely wished I had a teacher to teach me the basics of bread making. I made do with the knowledge I stocked up from reading and watching online videos. Kneading the dough was a big challenge. In a rare show of masochism, I decided to do everything by hand (I figured it would help to have a 'feel' for the dough). The dough was wet and sticky and unwieldy for a looong time. I set the timer and even after 20 minutes, the dough was nowhere near "round and smooth." But I'm glad I persevered because at about the 40 minute mark, the dough started coming together. Then I started scraping the sides and I think that messed up the consistency of the dough and it started getting sticky again. I must've been kneading for about an hour when I gave up and told myself "that's the best I could do." The dough wasn't a perfect ball, but at least it could hold itself together.
 On the tray for the 2nd rise.
I'm sorry I wasn't able to take a photo of the first rise. I fell asleep and even though I set the alarm for 1 hour, I overslept..not sure how many minutes more but when I checked, the dough had indeed doubled in size. I deflated it slowly. The dough consistency was surprisingly very soft and airy. But at least it wasn't falling apart and I could cut it up and shape it into balls for the 2nd rise.
 After the 2nd rise.
About halfway through shaping the dough, I figured I should vigorously roll the dough with medium pressure using the heel of my hand to get a good round shape. The later rolls definitely had better shape and form than the first ones.
 Close-up of the risen dough.
I put egg wash and oatmeal on top to create interest. Unfortunately, I think my silicone brush is too rough on the doughs and they did deflate a little after I put the egg wash on them. I think I'll invest in a better (softer) pastry brush next time.
 Into the oven they go...
When they were done, I brushed some butter on top to keep them moist. They were definitely best freshly-baked. Nice and soft and chewy. I ate a piece with strawberry jam ane one with peanut butter. It doesn't have the deep flavor of sourdough, but it was much better than what I expected for my first try. With strawberry jam, I found the taste strongly wheaty, but the funny thing is, I like the taste better when eaten by itself. I think I'll use proper orange juice next time (the one on the box). I have a hunch the natural OJ I used (from Navel Oranges) lacked tartness that could hide the tannic flavor of whole wheat.
 Done!
Done!All in all, I'm very happy with my first attempt at bread. The dough smelled wonderful throughout, from the time I was mixing it to when I was proofing it, and especially when they were baking. Daddy asked me to make the same recipe next time. I'm not sure if it's what I'll bake next time, but I'll definitely be making these Honey Wheat Rolls again. They make great wholesome dinner rolls.
 The rolls were kept warm using kitchen paper and a towel.
Now the question is if they'll still taste great after they cool down the next day. I'm looking forward to eating some for breakfast!
Wednesday, May 5, 2010
Marimorimo's Classic Donburi Made Better
 The donburi even shot beautifully!
Armed with my newfound realizations, I decided to tackle my 'signature' donburi dish (the recipe from the Bento Cookbook). Even when I didn't know what I was doing, this recipe hasn't failed me yet. But I wanted to see if my newfound knowledge would influence my take on this dish.
I followed the instructions more closely this time, instead of winging it. I didn't have enoki mushrooms so I subbed dried reconstituted mushrooms. The mushrooms took it over the top and beyond. They were so rich and flavorful. I think it's the naturally-occuring glutamate in the mushrooms (I've read of this somewhere before).
I may have browned the meat too much (and it didn't taste as rich as the mushrooms!).
Next time, I'll brown the meat just enough for it to change color, then put in half the sauce so it will take more time for the sauce to seep through the meat and develop the flavor. I prefer softer meat to tougher fried meat.
It was a good move of me to double the amount of sauce. It was just right. And I didn't play around with the sauce ratios either. It was just right. I think the meat and vegetable ratios are just right, though I just eyeballed them. Unlike when I usually go overboard and toss everything in, even the finished dish looked picture-perfect!
My previous 'revelation' has definitely started influencing my cooking, and I'm looking forward to cooking more!
Monday, May 3, 2010
Pork and Cabbage Stir Fry Take 2
In my previous cooking post, I mentioned the importance of learning technique in cooking - something I was seriously lacking in. So tonight, armed with cobbled-up know-how from painful experience and elsewhere, I decided to revisit an old favorite, Pork and Cabbage Stir Fry.
 For the first time, I actually knew what I was doing.
This is a simple formula I got from Hiro-kun's dad. Previous attempts to replicate it produced soggy messes. This time, I decided to focus more on technique and the right proportions and set out to create a better version (perfect may be pushing it).
I made sure to dry the meat before placing them on the well-heated pan. I made sure not to overcrowd the pan. I think I was successful because I noticed that the meat was browning - I have never been able to achieve this before. I was afraid the meat might overcook while I sauted the vegetables so I temporarily removed them from the pan, but later I found out this fear was unfounded. If anything, I wish I cooked the meat more. I used only half a head of a small cabbage, and it was just right. The cabbage cooked very quickly - too quickly for my expectations. In the end, I think they were slightly overcooked, but not so much so they still to tasted good. I put in the sauce last (concocted using miso paste, mirin, sugar, and my tastebuds). I added a sprinkling of black pepper in the end. I think I could use a tad bit more sauce. I was afraid of another goopy mess so I held back on the sauce this time. I think I also made the right decision by making the sauce more sauce than liquid. I added a sprinkling of black pepper in the end. When the dish cooled slightly, I could see there was some watery residue at the bottom, though I never added water.
All in all, I think this was a successful dish. The meat could use a bit more browning and a bit more sauce, and the vegetables slightly less cooked. These improvements I could work on and tweak next time. Amazing what knowledge of what exactly you are doing does to your work and methods. I'm inspired to study cooking science more. Alton Brown and a bunch of other cooking books, here I come...!!! (Now if only I had an unlimited budget...*sigh* I could be raiding Amazon US and Amazon Japan right now.)
Souffle Cheesecake

I challenged myself to another recipe from my Japanese Cheesecake Book - this time, a souffle cheesecake. Since the instructions are impeccable, I had no trouble following. The only problem was my own clumsiness and stupidity.
The book uses M size eggs. I thought this was a boon, until Mommy started stocking up on Jumbo size eggs that have 2 yolks in them! I was happy at first, but it started getting to be a problem, especially with the souffle, which relies a lot on eggs for body. My mistake was that I just haphazardly guesstimated the amount of eggs to use. The next day, I weighed the eggs, and found out that the jumbo eggs weighed 77g with shells on! L size eggs are about 60g, and M size ones about 50g. Thankfully, it didn't ruin my cheesecake, but it did have an eggy taste. My taste testers still loved it, though.
 Most of my post-baking disasters are due to my impatience and stupidity :(
Personally, I consider this a semi-disaster. The cheesecake was baked in a water bath, and I placed two layers of foil on the bigger pan (6 inch instead of 7 inches because of my stupidity). Nothing seeped through, but the smaller 4-inch pan didn't fare as well. It was very soggy because I didn't take enough care to seal the bottom with foil. I was actually confident nothing would seep through. This little experiment proved me wrong.
On hindsight, I should've filled up the pan with more hot water, but I had to keep the water level low due to the smaller pan. I took the cheesecake out a few minutes before the allotted time because the top was starting to look dark. It looked baked on the outside and on top, but when I cut through it, I realized that the bottom was still underbaked! It was the part that was submerged in water. I should've known - next time, I'll fill the water halfway up, and do the toothpick test (I skipped that).
I also had a disaster unmolding the cake. It was still hot as I handled it and placed it upside down on a plate. The nice baked top skin peeled right off. Really, someone needs to hammer patience into me....
Subscribe to:
Posts (Atom)
